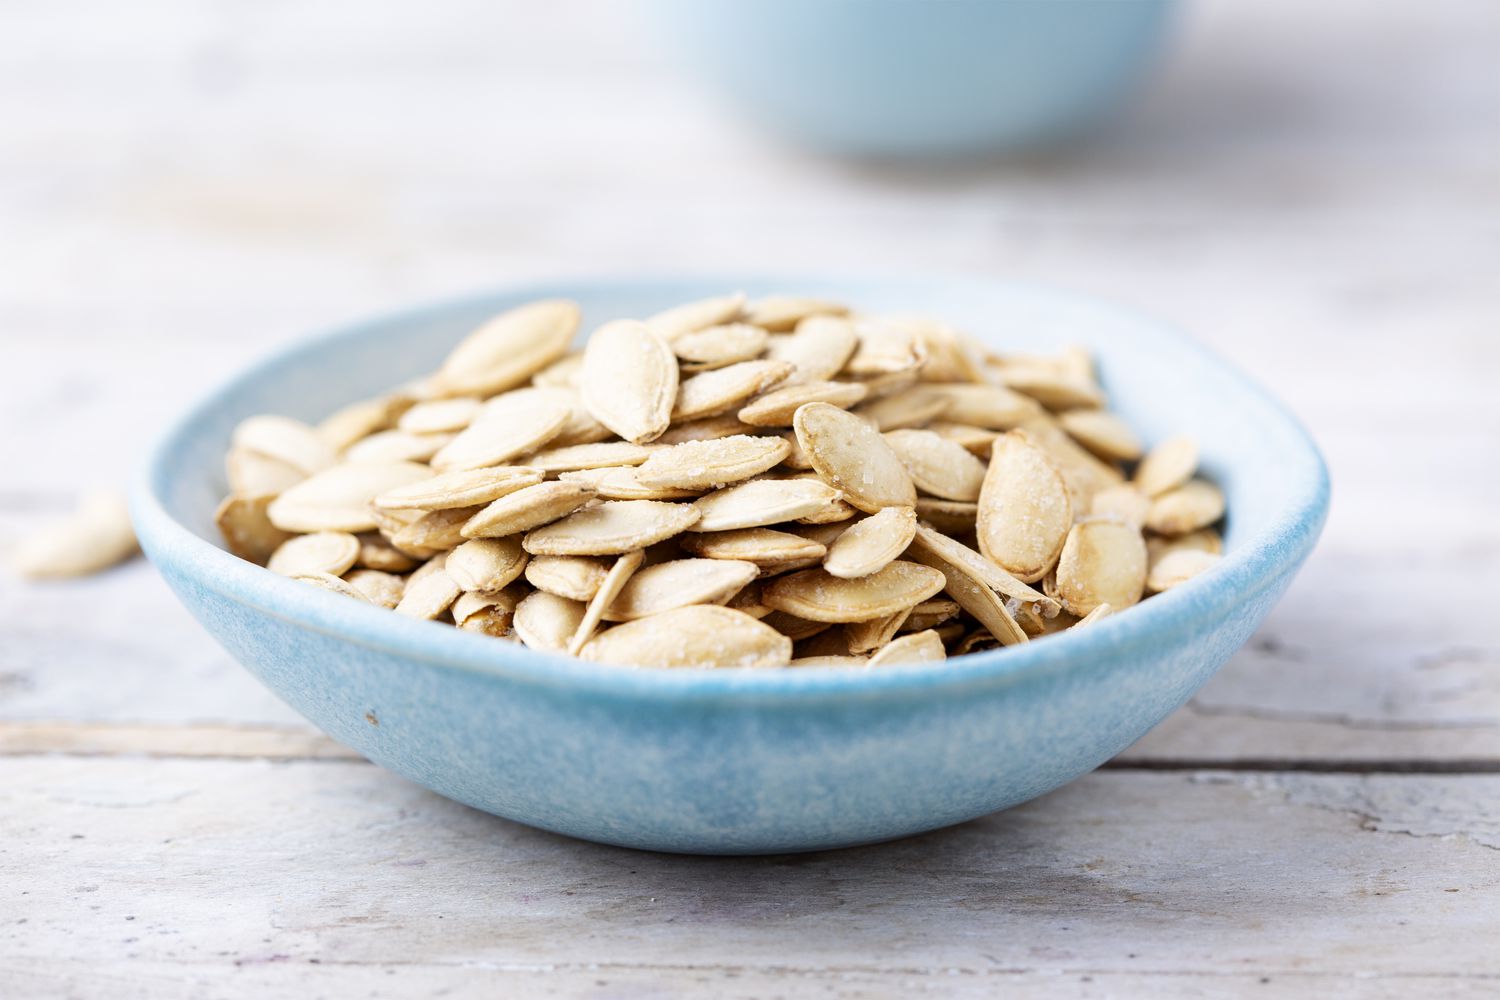
Roast Pumpkin Seeds Perfectly: Expert Tips for a Delicious Snack
Autumn brings with it a bounty of pumpkins, often destined for carving into festive jack-o'-lanterns or transformed into delicious pies, soups, and lattes. But in the midst of all this pumpkin-centric activity, there's one golden opportunity many overlook: the humble pumpkin seeds. Far too often, these nutrient-packed gems are discarded, contributing to food waste. Yet, with just a little effort, you can transform them into an incredibly healthy, crunchy, and utterly delicious snack.
Learning
how to roast pumpkin seeds is a culinary superpower that unlocks a world of flavor and provides a sustainable way to enjoy every part of your pumpkin. Whether you prefer them savory, sweet, or spicy, homemade roasted pumpkin seeds are infinitely more satisfying than store-bought varieties, and remarkably simple to prepare. This comprehensive guide will walk you through every step, from cleaning to seasoning, ensuring you achieve perfectly crisp results every time.
The Essential First Step: Cleaning Your Pumpkin Seeds
The journey to perfect roasted pumpkin seeds begins with proper cleaning and drying. This stage is crucial, as any lingering pumpkin flesh or moisture will hinder crispness and can even lead to uneven cooking or a gummy texture. Think of it as preparing a blank canvas for your culinary masterpiece!
Here’s a step-by-step guide to thoroughly cleaning your fresh pumpkin seeds:
1.
Extract with Ease: When carving your pumpkin or scooping out its insides for cooking, use a sturdy spoon to scrape out all the seeds along with the stringy, fibrous pulp. Collect everything into a large bowl.
2.
Rinse Away the Residue: Place the bowl under warm running tap water. Agitate the mixture with your hands; the seeds will naturally separate from the stringy flesh and float to the top. The warm water helps to loosen any stubborn bits of pulp clinging to the seeds.
3.
Strain and Separate: Use a small sieve, colander, or slotted spoon to gently scoop the clean seeds from the water. Allow the excess water to drain away. You may need to repeat the rinsing process if there's still a lot of pulp.
4.
The Drying Imperative: This is arguably the most critical step for crispiness. Spread the washed seeds in a single, even layer on a clean kitchen towel or several layers of paper towels.
5.
Air Dry Thoroughly: Allow the seeds to air dry completely. Depending on the humidity and temperature, this could take anywhere from a few hours to overnight. For best results, gently pat them dry initially and then leave them undisturbed. You can even spread them on a baking sheet at room temperature. *Expert Tip:* Ensuring the seeds are bone-dry prevents steaming in the oven or skillet, guaranteeing that coveted crunch.
Master the Art of Roasting Pumpkin Seeds: Oven vs. Stovetop
Once your pumpkin seeds are sparkling clean and thoroughly dry, you're ready for the magic of roasting (or toasting!). Both oven and stovetop methods yield delicious results, offering slight variations in texture and convenience. The choice depends on your preference and the quantity you're preparing.
Roasting Pumpkin Seeds in the Oven
The oven method is fantastic for larger batches and provides a hands-off approach, allowing the seeds to bake evenly to a golden crisp.
1.
Preheat and Prepare: Set your oven to
350°F (175°C). Line a baking sheet with parchment paper to prevent sticking and make cleanup a breeze.
2.
Season Generously: Place your clean, dry pumpkin seeds in a large bowl. Drizzle them with a neutral-flavored oil like avocado oil or olive oil – about 1-2 teaspoons per cup of seeds. The oil helps the seasonings adhere and promotes even browning. Add your choice of salt and spices (see our flavor ideas below!). Toss well to ensure every seed is lightly coated.
3.
Spread Evenly: Arrange the seasoned seeds on the prepared baking sheet in a single, even layer. Overcrowding can lead to steaming rather than roasting, so use multiple sheets if necessary.
4.
Roast to Perfection:
* For
whole pumpkin seeds (with shells), roast for
20 to 30 minutes.
* For
shelled pumpkin seeds (pepitas), roast for a shorter duration, typically
10 to 15 minutes.
* Midway through roasting (around the 10-15 minute mark), give the seeds a good stir or shake the pan to promote even browning. Keep a close eye on them towards the end, as they can burn quickly. They’re ready when they turn golden brown and smell deliciously nutty.
5.
Cool Completely: Remove the seeds from the oven and let them cool completely on the baking sheet. They will continue to crisp up as they cool.
Expert Tip for Seasoning: If you’re using delicate spices or ingredients like sugar, consider adding them during the last few minutes of roasting or immediately after the seeds come out of the oven. This prevents them from burning and ensures vibrant flavor.
Toasting Pumpkin Seeds on the Stovetop
The stovetop method is quicker, especially for smaller batches, and gives you more direct control over the process. It's technically "toasting," but the results are equally delightful.
1.
Heat Your Skillet: Place a dry, heavy-bottomed skillet (cast iron works wonderfully) over low to medium heat. No oil is needed at this stage, as we're aiming for a dry toast.
2.
Add Seeds in a Single Layer: Once the skillet is warm, add your clean, dry pumpkin seeds in a single layer. Do not overcrowd the pan; work in batches if necessary.
3.
Toast with Care:
* For
whole pumpkin seeds, cook for at least
20 minutes, stirring and shaking the pan frequently to prevent burning and ensure even toasting.
* For
pepitas (shelled seeds), cook for a shorter period, usually
5 to 10 minutes, stirring constantly.
* The seeds are done when they turn a rich golden brown and emit a warm, nutty aroma.
4.
Season Hot: Immediately remove the toasted seeds from the heat and transfer them to a bowl. While they are still hot, toss them with a tiny bit of oil (optional, for adherence) and your chosen seasonings. The heat helps the flavors meld beautifully.
Elevate Your Snack: Flavor Combinations and Seasoning Tips
While a simple sprinkle of salt is perfectly delicious, part of the joy of learning
how to roast pumpkin seeds is experimenting with a myriad of flavor profiles. The possibilities are endless!
*
Classic Savory: Beyond sea salt, try garlic powder, onion powder, black pepper, smoked paprika, chili powder, cumin, or even a dash of nutritional yeast for a cheesy flavor. Everything Bagel Seasoning is another fantastic option.
*
Sweet & Spicy: Combine cinnamon, a pinch of cayenne pepper, and a touch of brown sugar or maple syrup for an intriguing kick.
*
Warm & Sweet: Toss with cinnamon sugar, pumpkin pie spice, a sprinkle of nutmeg, or a drizzle of maple syrup or honey (add after roasting to prevent burning).
*
Herby & Fresh: After roasting, toss with finely chopped fresh rosemary or thyme for an aromatic twist.
*
Global Inspired: Experiment with curry powder, za'atar, or a blend of sesame seeds and soy sauce (toss with soy sauce during the last few minutes of roasting to let it caramelize slightly).
Pro Seasoning Tip: For a more intense flavor, warm your spices lightly in a dry pan for a minute or two before tossing them with the seeds. This "blooming" technique awakens their aromatic compounds. For even more detailed guidance on achieving that perfect crunch, check out our
Master Roasting Pumpkin Seeds: Oven, Stovetop & Cleaning Guide.
Troubleshooting and Expert Tips for Perfect Pumpkin Seeds
Even seasoned roasters can run into a snag or two. Here are some common issues and how to resolve them:
*
"Why aren't my seeds crispy?" The most common culprit is insufficient drying. Ensure your seeds are *bone dry* before roasting. Also, make sure you're not overcrowding the baking sheet or skillet, as this can lead to steaming. Roasting at too low a temperature for too short a time can also be a factor.
*
"My seeds burned!" Pumpkin seeds can go from perfectly golden to burnt quickly. Keep a close eye on them, especially during the last few minutes of cooking. Stirring frequently (stovetop) or shaking the pan (oven) helps prevent hot spots. If using high-sugar seasonings, add them towards the end.
*
Storing Roasted Pumpkin Seeds: Once completely cooled, store your roasted pumpkin seeds in an airtight container at room temperature for up to a week. For longer storage, they can be kept in the refrigerator for up to a month, or frozen for several months.
*
The Health Factor: Beyond their delicious taste, pumpkin seeds are packed with nutritional benefits. They are a good source of protein, fiber, healthy fats (omega-3s), and essential minerals like magnesium, zinc, and iron. Snacking on them is a smart choice for your well-being. Don't let those precious seeds go to waste – learn more about transforming them into a delightful treat in our article,
Don't Waste Them! Roast Pumpkin Seeds for a Crispy, Healthy Treat.
*
Shelling at Home: While shelled pumpkin seeds (pepitas) are readily available, you can shell whole roasted pumpkin seeds at home. The roasting process makes the shells brittle and easier to crack open, revealing the vibrant green kernel inside. It can be a tedious process, but rewarding if you prefer shell-free snacking from your fresh pumpkin.
Conclusion
Transforming fresh pumpkin seeds into a gourmet snack is not just easy; it's a rewarding culinary experience that embraces sustainability and health. By following these expert tips on
how to roast pumpkin seeds – from meticulous cleaning and drying to mastering both oven and stovetop methods, and experimenting with creative flavor combinations – you'll unlock a world of crunchy, nutritious deliciousness. So, the next time you carve a pumpkin or scoop one out for cooking, remember: those seeds are gold. Save them, roast them, and enjoy the perfect, homemade snack that everyone will love.